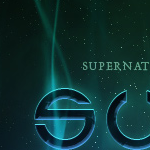
In this tutorial we'll be creating a smokey night effect on text to give it an eerie supernatural sort of feel. Finally to give it a more eerie feel I added a layer above all the others and with a large brush painted some green on top, then set the layer blending mode to Colour to make it so that the image is a blue-green colouring. And we're done!
In this tutorial we're going to use some super layer effects and a bit of extra magic to make a lettering style that looks transparent and stunning. It's best to place them on the most highlighted parts of the Q to make it look like they are sparkles from those highlights.
In this tutorial, it will show you how to create some special art on the existing photo. And, here the author give this a name called "Plasma" (Star, not the TV!). Hope you like it!

For this tutorial we’re going to use a little bit of 3D Studio Max, so make sure you have it and that you know your basics before you start. And there you have exploding text. Hope you enjoy.
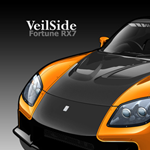
This tutorial will show you how to create a vector car.
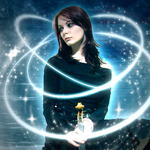
In this tutorial, it is going to show how to create one smoking woman using a couple source pics, and just a few of the features associated with Phoenix. So follow along. With the magic of Phoenix, you've created the smoking woman of your dreams.
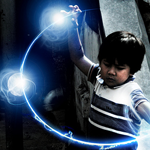
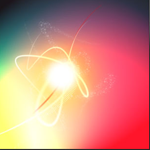
In this tutorial, you need to find a nice photo. This stock photo is found in the website Stock Exchange. For this tutorial you will learn some photoshop techniques to create a energy sphere effect. Hope you enjoy!
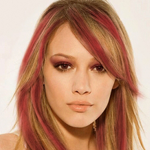
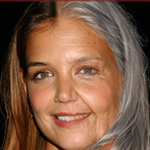
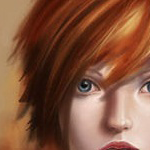
In this tutorial, it will teach you the steps of highlight someone's hair and if you want a dramatic makeover in your photographs in just few minutes, Then this tutorial is really help for you.
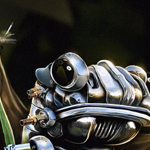
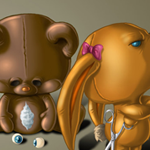
In this tutorial, it will show you some of the steps. Our image is complete! A robotic frog created using only the very basic tools of photoshop!
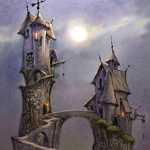
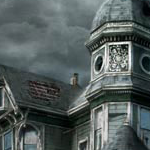
In this tutorial, it will show you how to initiate the paint of strange high house from draft to paint. Or you can draft whatever object on paper first, then scan your object. After that, you can apply the paint through photoshop featuring. Usually from drafting to painting, it takes at least 1 or 2 hours.

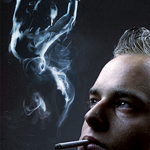
This article shows you how to create a smoke effect in photoshop, and to achieve that I used a photo of smoke and some photoshop filters. The best thing to do is to play with the brushes and with the tools to achieve the desired effect.
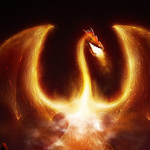
This tutorial is going to teach you how to make a nice fire dragon. The design process is very time-consuming. Hope you enjoy it!

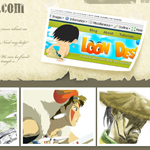
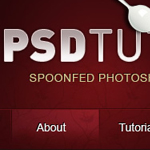
This photoshop cs3 tutorial will teach you how to make a nice-looking and professional header for your website easily. For the final result, add some text, rss icon image and simple reflection text.

In this photoshop tutorial we will take an image of a woman and enhance photos with the use of simple photoshop tools such as the lasso, color correction, and we will enhance the photograph using simple photo manipulation techniques. After you are happy with your artwork, adjust brightness contrast to add depth. You are done!

We’re going to create a simple Valentine’s Day e-card for your special someone. Believe it or not, we’re done. And it was such as short tutorial. Well folks, hope you’ve enjoyed this tutorial.
This making of showing how to create ‘’so, you really think. Finally a ‘‘fitting“ background colour is picked and simply draw a gradient. After that the animals are masked and on a layer under the animals shadows are painted.
In this tutorial, it will show you how to create an Explosion effect in a photo. It will let you know how to create a break apart, explosion effect and add some awesome lighting and glow to finish the image off.

This tutorial will contain 20 steps and explain how to make the MacBook Air ad.
This tutorial is actually a "making of" where explain how to proceed & achieve this matte painting. The last step is to create a Levels adjustment layer to get the final contrast of the matte painting.
This tutorial will show you on creating metal type abound online, as do variations on simple liquid effects.Tutorials on creating metal type abound online, once you have an idea of how different techniques fit together in a piece.
This tutorial will let you learn how to add a worn look that works well with cartoon style graphics. Different flavors of grunge styles are popular all over the web right now. Add in three images of your choice. Mask them to fit within the boundaries of the white rectangles.
In this tutorial, it will show you the ways of bringing originality to digital lighting by introducing and vectoring traditional sketches, as well as examining some nifty Illustrator-based stroking techniques. Hope you like it!
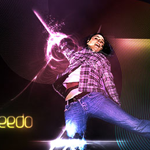
This is my first tutorial in over a year and a half. It will show you the lighting effect!
In this tutorial, it is going to show you how to basically go about aging a woman’s face in photoshop. It may not be the most technically detailed tutorial but it gives you a good idea of the process to get the job done.
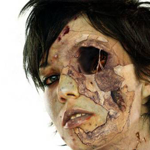
In this tutorial, it will display the process about how to turn a beauty into a Zombie. In the final part, using overlay, soft light and color burn layers and soft red and black brushes to add more shadow and bloody parts.
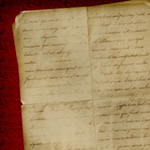
In this tutorial, it will show you how to create a Custom Brush using a folded piece of paper and then how to use that brush to create an old piece of paper. To begin with, a plain white piece of paper will be taken, folded it in fours and left it in my pocket for a few hours. Next you need to scan the paper using the Grayscale setting on my scanner.

In this tutorial, the type-effects shows how to create the above image. The key is to create the letters in a 3D package first as individual characters, then bring them into Photoshop for further post work.This example has a few more details, but you can take it much further.
( Source: imarc )
Add a bit more ligtning to the sky and add more shadow burning to the water a edges of the photo. The green kind! What better way to kickoff the summer spirit than with explosions, death rays, and a little stormy weather.

In this tutorial, it will show you to create a "simple" moody image using loads of simple effects to create an image with depth and composition. This is simpler than you think but can demand a lot from your system. Thank you!

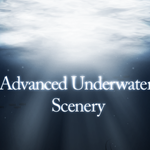
In this tutorial, itshows you how to make a splash, blending two very different images to create this amazing underwater effect, complete with a dissolving figure of a man. At the end, the last adjustment is to draw focus to the centre by blurring the edges a little. Hope you enjoy!
This tutorial will show you how to start from drafting and end with painting.

In this tutorial it will show you a creative process. The workflow for creating the splashes involves taking photographs of thrown paint. In the final, you can add anything you want to your advertisement design. You can add a logo and some text in the image you want.

( Source: pstut )
In this tutorial, it will teach you how to design something along the lines of a Royal Interface. And, you will have a chance to learn the techniques about making the shiny effect. In the final, throw some text on it and there you have it, hope you enjoy.
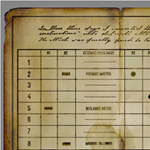
In this tutorial, you will be able to learn the techniques to create a texturing old paper. It is preferably creating an old paper using photoshop to consume your time looking for it from archieves.

In this Photoshop tutorial, it will let you learn how to take a single photograph and turn it into a collage of polaroids, with each polaroid containing a small section of the overall image. Your support goes towards keeping this site running and keeping new tutorials coming!

In this tutorial, it will show you how to create an artistic and un-typical CSS list menu as seen on Web Designer Wall. In this article, you will learn how to design a watercolor effect menu and how to slice the menu and code in CSS. Have fun!

This tutorial is done on CS3 but the main screen should be pretty similar. Finally select the burn tool from the tool menu and select a large soft brush (bigger the better) on a 35% opacity and rub around the lower edges of the canvas so the overall glows seems to be coming all from the middle.

The pop art that you will create using this tutorial will look fantastic if you get it printed at your local print shop. The final step for creating the dots is to create a Clipping Path between the new layer and the "dots" layer. Hope you found this Photoshop tutorial helpful.

In this tutorial I'll show you a really simple effect that together with good photography can be used to make gorgeous results. We're going to compose a room using photos of objects. This room can then be used in Flash to build a website, or simply as a graphic.The final effect with the right photos can be really nice and is particularly good for use in Flash where you can make objects fly in or materialize.
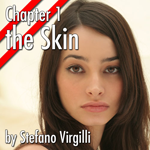
In this tutorial, you will learn how to photo retouch the skin of a model in a few steps. Better results can be obtained by using a graphic tablet instead of a mouse.
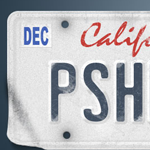
In this Photoshop tutorial it will show you how to create a custom vanity license plate using a few basic Photoshop tools a piece of reference material and some creative layer stylings. When you finish off, you can use the final result for your car license. Hope you will like it!

The goal of this tutorial is to create a matte painting in the fastest and most direct way possible. From drafting to painting, you will be able to see the entire process in this. It is going to take you quite a while to do this. Take you time!
The tutorial will show you the steps of creating table ball & vase in 3D. Let you know how to process the 2D image into 3D. Hope it can give you an idea to create 3D object.

In this tutorial, it will show you a few substantial techniques to create a nice photoshop products. The techniques include Shapes & Styles Redux , Shine a Light on the Subject, Forcing a Gradient to Behave, Dashed Strokes, When is a Stroke not a Stroke, Mixing and Matching & Photoshop CS2 and Layer Styles.
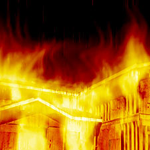
In this Photoshop tutorial, it will show you how to create “Burning Down the House”. To apply this burning effect, you can turn your selected object into fire with half an hour.
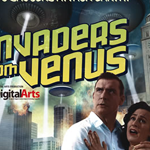
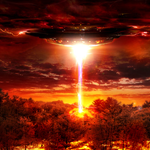
In this tutorial, it shows you how to combine 3D renders with stylized photography, text and smoke to capture all the camp horror of an alien invasion. Finally set some photoshop features, then it is done!
Using gradients and layer styles, that we can use to produce nice subtle 3D effects in our web designs. Sometimes little details like subtle gradients or borders using 2 colors can create a very nice visual effect or unique style without requiring many hacks and adjustments.
This tutorial will show you how to make a semi-transparent vista inspired menu, using gradients, shadows and blurring to produce a stunning modern effect. This menu produces a stunning effect when coupled with a bright scenic background. It uses transparency to great effect as well as modern gradients. The use of highlights is a great trick to providing a cutting-edge modern look to pictures.

Firstly find a subject to base the flowing light streams on. A picked image of a drinks can to relate to the original piece of artwork that inspired the subscriber. Finish off the image with a few focal rings on multiple layers with very low opacity.
Through this tutorial, we will cover the use of channels as well as cool filters such as chrome and radial blur. For the finishing touches, another layer, and used simple shapes are created fish. Add some text, and anything else that your heart desires.
Source: photoshoplady.com
Posted By: IndoSourceCode

 Home
Home Downloads
 RSS
RSS